Installing deck railing doesn’t need to be complicated. All you need are the proper tools and components. Even if you’re a DIY homeowner with no prior experience, you can definitely install these products on your own. Just make sure to follow the instructions carefully. Whether you’re installing glass or cable railing, we have a wide resource library to help you install properly.
What tools will I need?
Using the correct tools for the job is important. It will help you install quicker and ensure that there are no inaccuracies on the jobsite. The tools you will need for your install depend on what kind of railing infill you are working with. Here’s the breakdown.
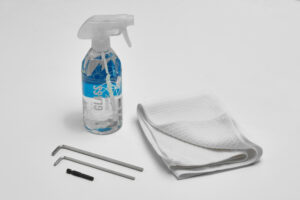
To install glass standoff pins, you will need:
- Glass suction cups
- Glass cleaner
- A towel
- Screw wax
- An Allen Wrench
To install glass talon spigots or glass or cable railing posts, you’ll need the cable or glass rail installation kit that comes with:
- A tightening tool
- A wood block
- String
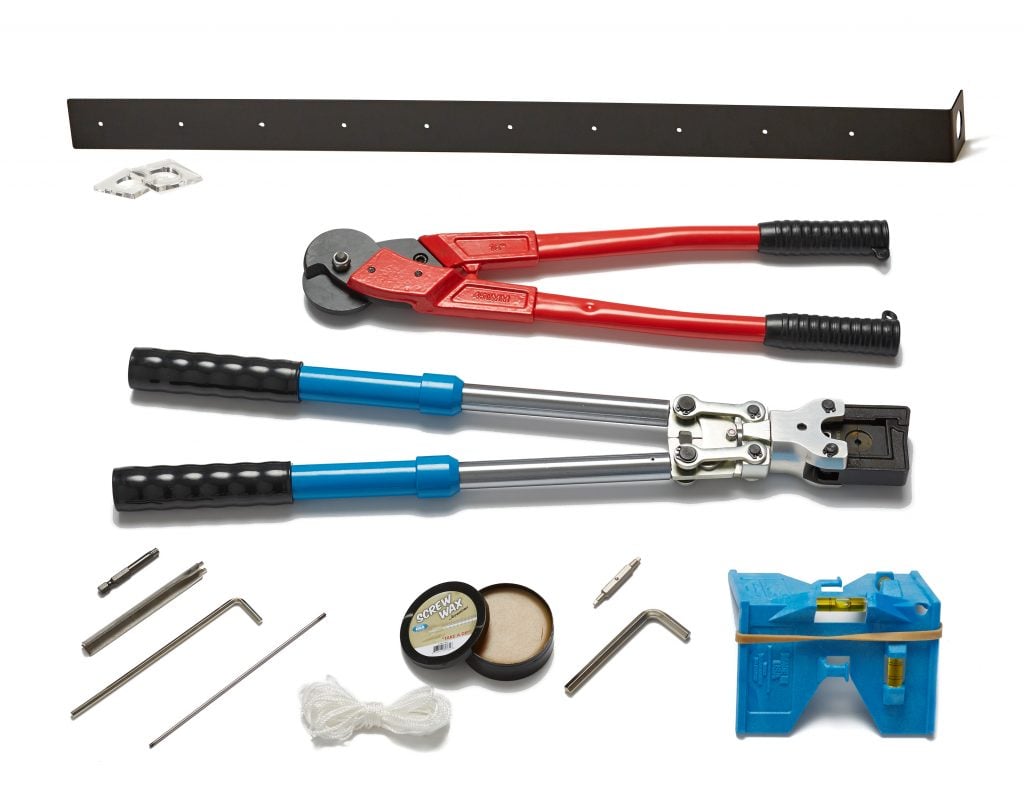
To install cable railing with rod infill, you’ll need the rod infill installation kit, plus:
- An angle grinder with a thin cutting wheel
Learn more and how to Install deck railing!
Unpacking
Once your shipment arrives, it’s time to get to work. Start by inspecting your boxes to make sure they are all intact. You want to report any shipping damage as soon as it happens. Next, unpack your components and look through them to make sure you have the correct type and number.
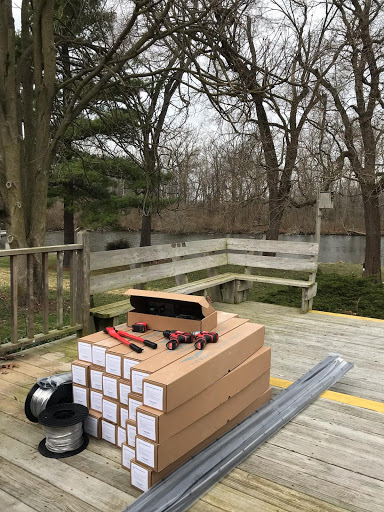
Your box should include a metal post wrapped in a plastic sleeve. You should also have a handrail bracket and attachment screws. Depending on your purchase, you may have a sealed package with cable fittings such as a tension kit or other components. You may also have post mounting screws, the long screws used to mount the post. You may also have six stainless steel handrail attachment screws, and a foot cover.
Keep in mind that the components will differ depending on what you purchased. If your project is extensive, we likely sent you a drawing when you gave you a quote. Get that drawing out if you have it. It will contain the most accurate information For the most accurate information, refer to the layout you received to quote the job. This will tell you everything that you should expect in your package.
Once you’ve verified the components, it’s time to start prepping.
Preparation
Take out your posts and foot covers (if you are working with foot covers). Slide the covers onto the top of your posts. Next, take out your handrail brackets if you have them. For Universal Top posts, place each bracket on the top of the dome, then fasten it by inserting the screws. For Flat Top posts, place the bracket in the top of the post, then fasten it by tightening the nut.
Now that you have your foot covers and handrail brackets, it’s time to lay out all your posts where they will be installed. This will help you visualize what the final project is going to look like. It’s helpful to have this birds-eye view before you actually start installing anything, so that you can make any necessary adjustments before you begin.
Refer to the layout drawing you received along with your quote to put the posts in place. You should notice a post number on each post box that corresponds to the post labels on the layout. Exercise lots of caution while laying out your posts. You don’t want to accidentally knock one of them over and damage your new railing or yourself! Also, be sure to place the posts no more than 4 feet apart. This reduces cable deflection and keeps you in line with code.
Once you’re all set up, run your string through the bottom cable hole in each post to make sure that the bottom cable will clear stair nosings. You can also lay out your handrail to check the lengths and angles, and consider whether any of your handrail brackets need to be bent to turn a corner. Once you’re satisfied with the layout, it’s time to start mounting.
Mounting Posts
Get out your mounting screws to secure your posts. Before you screw the post down, make sure that it is plumb, or perfectly vertical. It’s very likely that you will need to shim your posts to make them all consistently plumb. Shimming a post refers to wedging a small piece of wood or plastic to adjust the fit, or provide a level surface. You might be tempted to hurry past this step and just start drilling, but resist that urge! Paying attention to the details will pay off when it’s time to attach the handrail.
Refer to the appendix in your installation guide for the exact details on how to mount your specific posts. All mounting screws must go into the firm framing material. If you are installing into a composite deck, be sure to drill your mounting screws into 4 inches of solid wood, not plastic. If you are installing glass or cable posts, this guide will outline how to do it. If you are installing rod railing, refer to the rod rail installation guide.
See our full guide on how to lay and mount cable railing posts
Attaching Handrail
During your layout process, you may have noticed that your handrail needs to be trimmed in some place. Don’t worry: you can easily cut it down to size on the jobsite. Measure carefully to determine the cut length, then cover the side of the handrail with painters tape. This will protect the metal from marring. Cut the handrail using a chop saw with a special blade designed for cutting stainless steel. Do not attempt to cut the stainless steel with any other type of blade.
Once your handrail is trimmed to the desired length, tap in the end caps with a mallet. You can cover the mallet with fabric to protect the finish of the end cap. You can also use Epoxy to secure the cap.
Next, grab a friend and set the handrail on your posts. This section will take some special consideration depending on the type of handrail brackets you are using, so we recommend following along the correct installation guide for glass railing, rod railing, or cable railing.
See our full guide on how to attach handrail to cable railing system
Running Cable, Rods, Or Attaching Glass
Now that your handrail is secure, it’s time to install your infill. Whether you’ve ordered traditional cables, cutting-edge rods, or innovative glass, we have detailed instructions to help you secure your railing safely and easily.
Running Cable
Running cable is a fairly involved process. You will need to measure, cut, and crimp your cables, then thread and tension them through your post. Take a look at the cable railing installation guide for a detailed breakdown of this process. Learn more about cable rail post spacing and cable deflection in this video, or learn how to install slim side mount cable railing posts. If you’re installing cable into wood posts, check out this installation guide. And, for a complete list of resources, head to the cable railing resource library.
Running Rods
Attaching rods is a straightforward process, but it’s important to know the correct steps. The process will differ slightly depending on if you are using a level (flat) run or an angled run, like a staircase. Take a look at our resource library for installation videos, code and safety resources, and more.
Attaching Glass
Glass railing is an innovative system, and as you know from the planning process, there are several different options of glass railing systems. If you’re using standoff pins, refer to our install guide or video. For baserail, refer to the baserail installation guide. For talon spigots, check out the surface mount or side mount guides.
Finishing Touches
You’re almost done! Now it’s time to make sure that your deck railing system looks its best. Cleaning and sealing your stainless steel system after installation is the best way you can ensure that your beautiful investment lasts. Start by rinsing the stainless steel completely with water to get rid of any dirt or debris. If you have a pressure washer, that’s even better.
After your system is rinsed, apply the Marine 31 Stainless Steel Liquid Polish. Then, rinse the polish away completely (you can even wipe the steel down with rubbing alcohol to make sure all the polish is removed), then apply the Marine 31 Stainless Steel Liquid Sealant.
Other Questions
We hope you’re satisfied with your beautiful Viewrail deck railing system. If you have any other questions, feel free to reach out to us, and we’ll be happy to answer them.