Revitalize a Deck | Removing Old Railing, Staining, & Powerwashing
How to Prevent Deck Rot
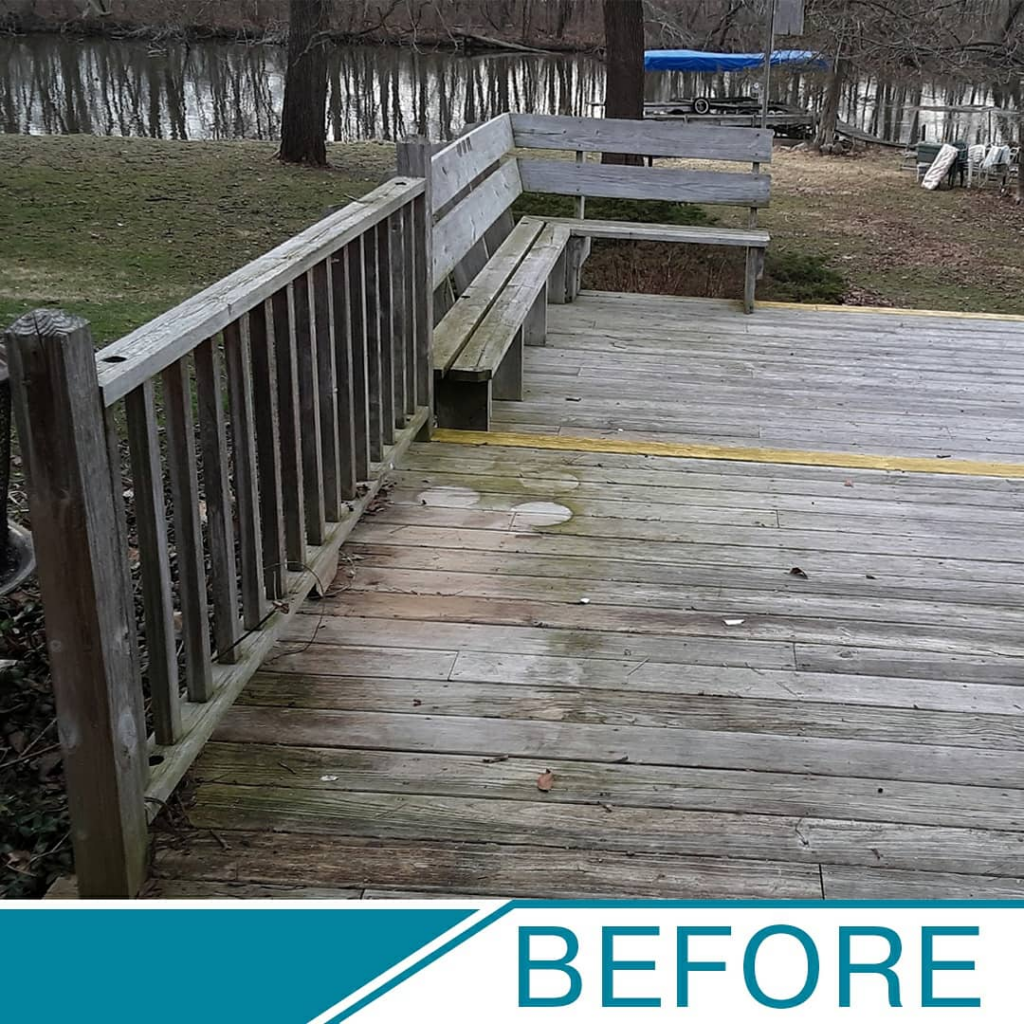
The process of revitalizing your deck begins by evaluating the quality and integrity of the wood deck. It’s no surprise that decks rot & deteriorate and need to be replaced at some point.
Sometimes, wood deck rot means decks need to be stripped and replaced. However, many homeowners rip out their existing decks too early instead of revitalizing what they already have. With a little bit of time, sweat, and hard work, you can redeem and restore a pre-rotten deck before it is destroyed.
- Sunlight
- Moisture
- Pests
Understanding the Sources of Deterioration
Sunlight – Over time, exposure to natural sunlight will cause your wood deck to rot. More than heat, ultraviolet radiation (UV Rays) travels in sunlight damaging wood decks over time.UV Rays are the highest cause of fading because they break down the chemical bonds in an object, causing the existing color to fade.
This is sometimes referred to as a bleaching effect and can be seen in everything around your home – from your exterior siding to your masonry and of course, to your deck and railing system.You can tell that a wood deck is suffering from UV exposure when the boards start to turn a grayish hue, looking more natural and rustic in color. This common symptom indicates that a greater problem is at work. The radiation from the UV rays penetrates below the surface of the wood, which can begin to cause wood rot.
Moisture – Another source of deterioration is moisture. Depending on the climate and where you live of the country you live in, moisture levels will vary. Some areas of the United States naturally have higher levels humidity in the air (areas with the highest humidity), most notably areas along the coast or close to bodies of water – such as Washington, Florida, or even in States by the Great Lakes, such as Michigan.
Decay Fungi can only survive when these four conditions are met: sufficient oxygen, temperatures between 40-90°F, moisture content in wood fibers above 25%, and sufficient energy source (i.e. the wood).Pests – A final and often overlooked source of deterioration is pests. While most people consider the threat of sunlight and moisture in the planning of their deck, many often forget about the critters and bugs that can invade the decking area. There are six common pests that live in, on, or under your deck: termites, carpenter ants, carpenter bees, powderpost beetles, mice, and other rodents (such as rats, racoons, opossums, skunks, etc.). The best way to prevent pests from invading your decking area is to prevent the sources that attract them in the first place. Some common preventative measures include:
- Sealing your wood deck with a protective coat. Many sealants can be infused not only with mildewcides, but also with pesticides.
- Trim all plants away from the deck, leaving little to no room for them to hide.
- Remove any standing water from around your deck.
- Cover the gap between the deck and the ground with trim or some form of a screen.
Final Recommendations to Combat Weathering
One of the best ways to combat weathering (consisting of both UV exposure and moisture damage) is to shade wood surfaces as much as possible. This can be accomplished by extending roof overhangs or by adding a roofed porch onto your home. Additionally, it is a good rule of thumb to keep all vegetation at least 2 feet away from your deck, so as to allow adequate ventilation and airflow to dry out the surface of your deck. Another common practice is to give your deck a regular cleaning with a power washer, as well as with a type of surface cleaner that can properly remove excess debris or mildew formations from the fibers on the surface of the deck. Finally, the best and most practiced remedy for both restoring and preserving the wood on your deck is to apply a highly durable exterior sealant. A sealant should be properly maintained and reapplied every few years, depending on the opacity and condition of the sealant.How to Powerwash Your Deck
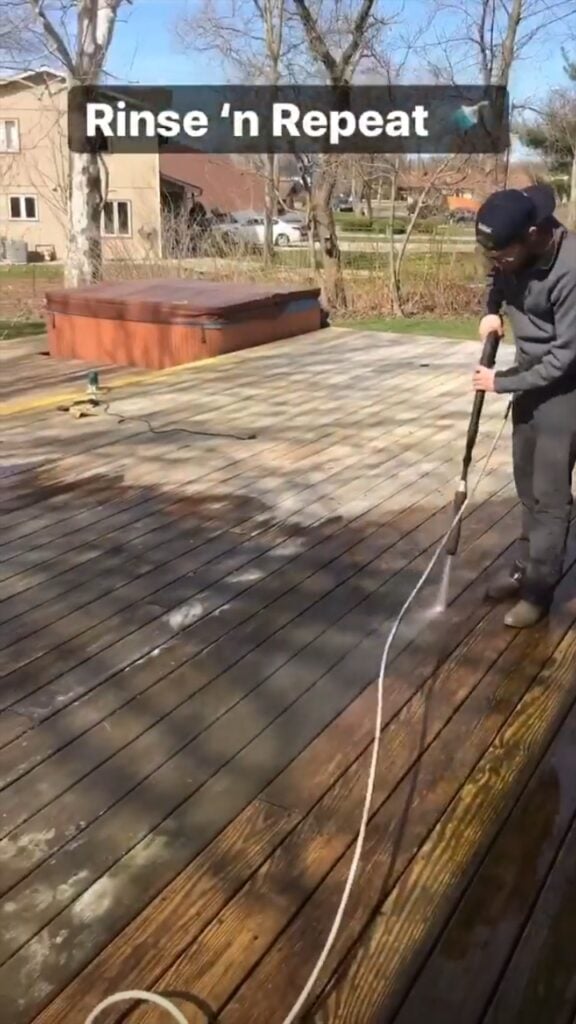
Powerwashing your wood deck is the best way to remove dirt, debris, and even sealant or paint that has started to peel. Additionally, a good pressure wash to your deck will open the wood pores, allowing for a deeper penetration of your sealant or paint.While powerwashing is beneficial and effective for a wood deck, it can be extremely harmful and damaging if not done correctly. There is more to powerwashing than simply turning on your powerwasher and spraying your deck. A few important techniques to remember are spraying at the appropriate pressure, maintaining consistent distance, and using additional cleaning products.
If you do not have a pressure washer, consider asking your neighbor or a family member to borrow theirs. You can also rent one for a day from most local hardware or equipment rental stores.
Step 1 – Setting Your Power Washer Pressure
The first and most important factor in pressure washing is your psi setting. Not all pressure washers are created equal. For example, some pressure washers boast the ability to achieve between 3200 to 7000 psi. While this is impressive, remember that pressurized water can be used as a technique for etching stone and concrete – this is NOT something you want to do to your deck! You should start with pressure washing by experimenting with different nozzles on your wand at around 500-600 psi. This is an ideal starting setting for softer woods, especially cedar or pine. However, if you find that there isn’t a great deal of change, you can turn up the setting, as long as you do not exceed 1,200 psi. If you start to see splintering or wood shavings, your are damaging the wood and should immediately stop. Reset to a lower setting and continue pressure washing. A helpful tip is to test your pressure on a more hidden area of the deck, such as a stair tread. You will find that replacing treads is much easier and cost effective than needing to replace an entire decking board. As you pressure wash, continue to move with the grain of the wood, following the entire length of the board before moving on to the next one.Step 2 – Consistent Distance
Another important technique is consistency, both in the distance maintained above the deck as well as the direction you move the sprayer. You will want to maintain a distance between 12 – 24” depending on your psi setting and the nozzle you have attached to your wand. We recommend using a fan tip with a 40 – 60 degree spread, moving side-to-side in a sweeping motion. Follow the grain of the board down the entire length before moving on to the next, repeating until you have successfully swept the whole deck with your power washer.Step 3 – Using Cleaning Products
The final and most overlooked portion of pressure washing is applying a cleaner to your deck. As you pressure wash, you will find that some stains and discolorations do not come off with just pressurized water. This is especially true if the wood is badly darkened or stained from years of neglect. We recommend using deck strippers, such as Restore-A-Deck, which can be applied to your deck as you are pressure washing. Restore-A-Deck is one of the leading brands of deck strippers that are eco-friendly and yet penetrate stains deeply. Simply work in small sections, dampening your deck area that you are preparing to clean and apply the cleaner. After waiting for 10-15 minutes, resume and spray off the area you just applied Restore-A-Deck. Not only will this get rid of those tough stains and discolorations, it will brighten and restore color back to your deck without the toxicity of bleach. In some cases, this removes the next step of Sanding entirely and is sufficient for moving on to Stain/ Sealant Application.How to Remove Old Deck Railing
When it comes to removing existing railing, you should factor this into the overall evaluation stage of your existing structure. Demolishing or removing your current deck railing to be invasive and cause damage to your existing deck boards that would cause them to need to be replaced.
This is especially true of railing systems that terminate into existing deck boards, such as vertical spindles or balusters.
Step 1 – Evaluation Deck Health
Evaluate your existing system and determine how many deck boards will need to be replaced due to damage from existing railing removal. Even if you believe you can remove the existing railing without damaging deck boards, it is beneficial to get a few replacement decking boards from your local hardware store. (PRO TIP: Contact the manager of the lumber department and ask if they have any good boards that have aged for a year. You could also call a local deck contractor and ask to purchase a few boards from them. This will help you match existing boards with replacement ones much easier.)Step 2 – Remove Deck Railing Infill
After an overall evaluation, make note of what tools you will need to remove existing deck railings. If you do not have all the necessary tools, you can either buy, rent, or borrow, depending on your budget. Success in deck railing removal depends in large part on the tools you use in the process. Here is a shortlist of some tools you will need: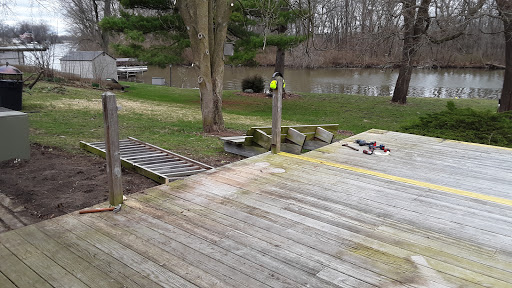
Step 3 – Remove the Decking Posts
Next, cut the railing cap, handrail, and posts with a reciprocating saw. Make sure that you are using an appropriate blade for the material you are cutting. In some cases, a general-purpose blade (made for cutting through both metal and wood) may be best, as you will be cutting through both screws and wood that has been fixed together. You may need to use a pry bar and power drill as well. Remember, the goal is to leave as much of the existing deck as can be salvaged. Try to plan ahead and remove everything, posts especially, in a way that preserves the deck.
After taking everything down, remove nails and screws from the old deck boards for your waste management company. Here’s what our deck looked like after removing the railings!
Each deck railing system is a little different. Some systems you’ll need to unscrew deck railing posts, and some you may want to leave and clean.
How to Stain a Deck
Now that you have removed all the previous railing structures, it is time to prepare your deck for finishing product. All wood decks need to be finished with deck stain product to both protect the wood and prevent damage to the wood.
Wood decks rot are damaged from three main sources: sunlight, moisture, and pests. A good finishing product protects from these, as well as prevents your wood from cracking or checking prematurely. There are two different ways you can seal your deck, either with a transparent sealer or a pigmented stain. While some might think that deck sealer and deck stain are the same thing, they are in fact two different products.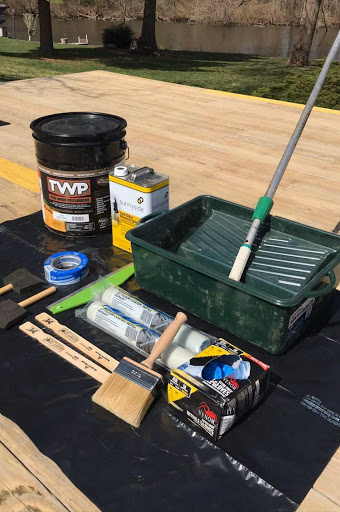
Deck Sealers
Most sealers are a clear or transparent finish that penetrates the wood and forms a clear film on the top. Sealers only protect the wood from moisture, not from the checking and cracking that comes from drying out. While they may prevent fungal growth and wood rot, they do not protect your deck from UV rays and adverse effects from exposure to sunlight. This will manifest in the graying or aged “fading” appearance of the top of the wood deck. Additionally, the UV rays will dry out the wood’s natural oils, leading to cracking and splitting, often referred to as checking. For this reason, we recommend that you choose a stain as the finish product of choice.Types of Deck Stains
Deck stains have the same water-resistant qualities that deck sealers have. However, deck stains have additional pigment, giving color to the finish application instead of just being a transparent coat. The intensity of the color, often referred to as the opacity, will vary on a spectrum from semi-transparent to semi-solid to solid. Here are the differences: Semi-Transparent Deck Stain: Allows the grains and natural color of the wood to permeate through the stain pigment. Maintains the integrity of your wood deck board’s appearance and offers a more natural look. Lifespan varies between 2-3 years before reapplication is needed. Semi-Solid Deck Stain: Allows minimal grains and natural color of the wood to permeate through the stain pigment. Beneficial in hiding blemishes or other unwanted appearances. Lifespan varies between 3-5 years. Solid Deck Stain: Hides the grains and natural color of the decking board completely. Beneficial in providing a uniform look to your deck, making newer replacement boards nearly indistinguishable from older boards. Lifespan in protected areas can be as long as 10 years, making a solid stain very economical. In areas where there is high sun exposure or heavy foot traffic, you will need to recoat every year.How to Choose Your Deck Stain
A final consideration in choosing your deck stain is whether you want an oil-based stain or a water-based stain. Most people prefer oil-based over water-based due to its longevity, reliability, and overall performance in protection for decking boards. The most important thing about stain is how well it protects the wood from UV fading, water damage, mold/ mildew issues, and pests.Oil-Based Stains
Derived from either synthetic or natural oil, oil-based stains penetrate wood very well and provide outstanding protection. Since oil molecules are smaller than water molecules, they penetrate more evenly and deeply into the fiber of the wood, allowing greater protection and preservation. Additionally, oil-based stains take longer to dry or cure, giving a more even appearance. However, the long drying time means that you need to pay attention to the weather. If it has rained within 24 hours or rain is coming in 24 hours, this could compromise the finish of your stain. You need drying times of 24-48 hours, depending on the stain, as well as an ideal temperature window of 55-80 degrees Fahrenheit. Finally, oil-based stains give off a strong odor and cannot be cleaned without mineral spirits.Water-Based Stains
Due to stricter Volatile Organic Compound Laws (VOC Laws), many states are seeing a rise in the popularity of water-based decking stains. One of the main advantages of water-based stains is that they boast great color retention over oil-based stains. Additionally, these stains can be applied in the same day that much of the prep work of cleaning your deck happens. Once you have finished powerwashing your deck, you can immediately start staining. Due to their quick drying time, you don’t need to worry about the weather affecting water-based stains as much. They give off far less odor than oil-based stain and clean up easily with warm water and soap. Finally, they are environmentally friendly. However, since the molecules of water are larger than oil, this type of stain does not penetrate as deeply into the wood and wear more quickly than oil-based stains. They also peel or flake off once the stain begins to fail, making it harder to maintain.Preparation for Finish Product
Before you begin staining or sealing your deck, you should start by washing your deck with a pressure washer. Not only does pressure washing remove excess dirt and debris from the surface area of your deck, it also opens up the pores of the wood, preparing the fibers to receive stain much more readily. You can find even greater success if you use deck cleaner and brightener as well. We have seen great success with the two step system of Restore-A-Deck Cleaner and Brightener. Not only does this system remove mold, mildew, algae, and the graying appearance from UV Ray damage, it also gets a deeper clean than just a powerwash. It is both environmentally and pet friendly, making safety less of a concern in your cleaning process. Finally, the Brightener removes rust stains and tannin stains caused by fallen leaves and other debris. By enhancing natural colors in the species of your decking boards, this product preps your boards to the fullest for a transparent or semi-transparent stain finish.Sanding Your Deck
You may find that your deck is in need of more than just a good pressure wash and cleaning, especially if your deck has been neglected for a while. If this is the case, we recommend holding off on brightening your deck until you have sanded it. It is best to borrow or rent a walk-behind orbital sander. Do not go below 60-80 grit on your paper, as this could damage the decking boards and cause inconsistency in the stain finish.
How to Measure for Deck Railing Posts
After completing the deck staining proces, you are ready to install your posts! After everything is complete, make sure that you know what type of railing system you want. Here at Viewrail, we offer 3 different types of railing options: glass, cable, and rod railing. If you’ve already decided what you want, learn more on how to install deck railing
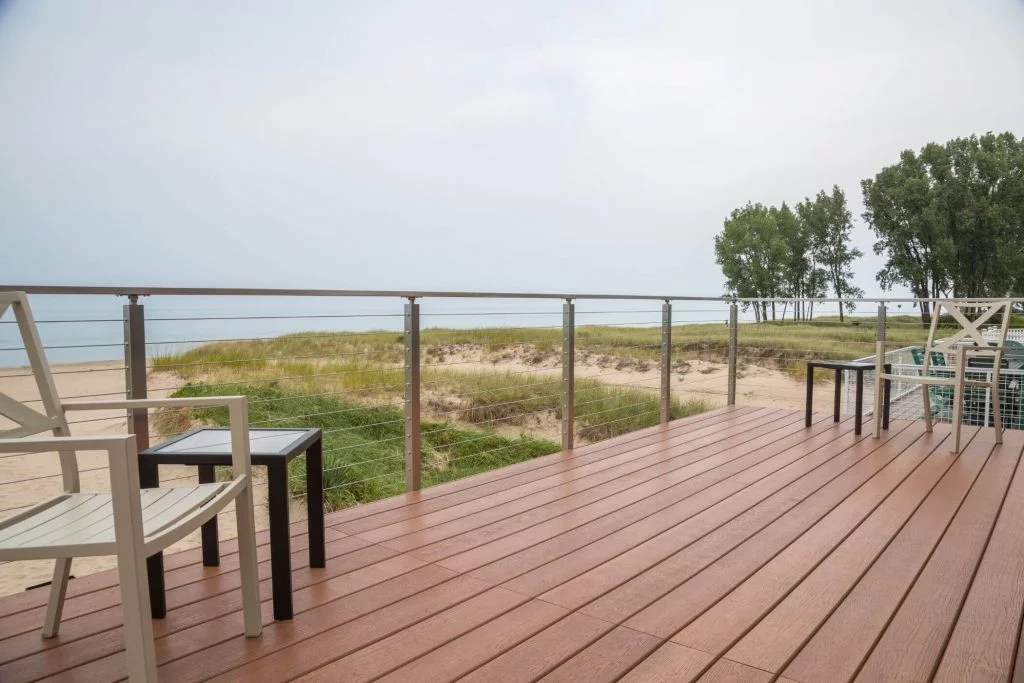
Glass Railing – Glass railing is by far the least obtrusive railing and maintains the entirety of your view. Due to increasing popularity, glass is rising as the railing option of choice for many homeowners. Not only does it boast unrivaled views, it also is incredibly safe, offering high-thresholds of tolerance even in the midst of hurricane force winds.
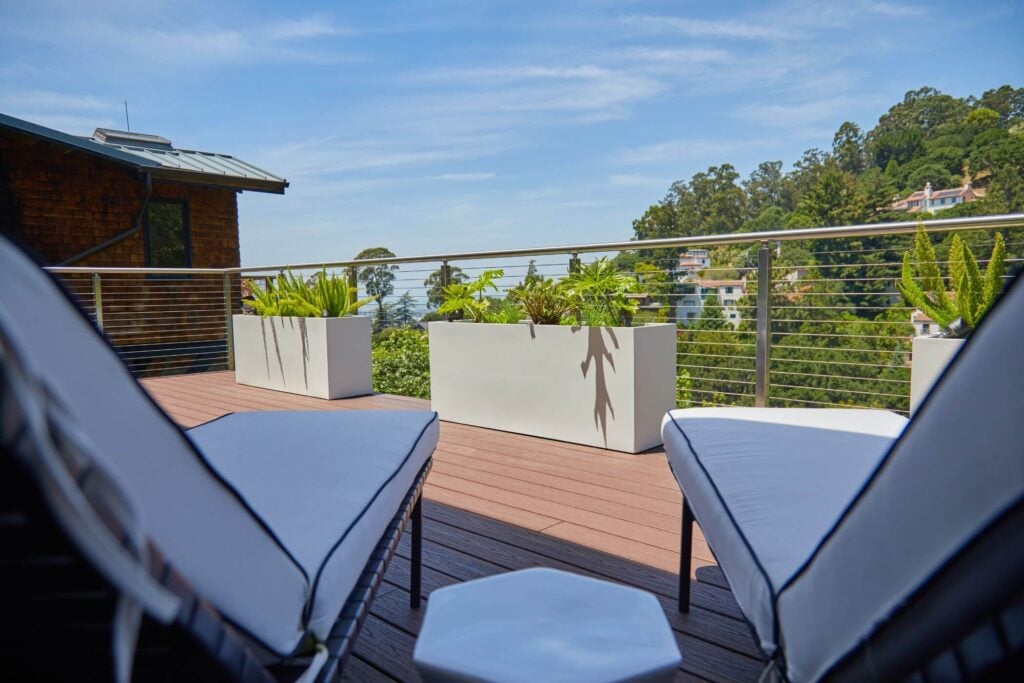
Cable Railing – Cable railing is our most popular railing system of choice. A very popular option, cable is relatively easy to install. From the avid DIY’er to the custom home contractor, cable railing is a staple in the railing and decking industry.
Rod Railing – Rod railing is our most innovative railing system. We manufactured rod railing to circumvent some of the install discomforts of cable railing, yet maintain the same aesthetic as cable railing. Rod railing is accessible for the DIY’er and custom home contractor, offering versatility in color options and installation formats. Additionally, rod railing can follow curves and is not bound to linear runs. Rod railing is quickly bringing fresh looks and innovation to the railing and decking industry.
All of our systems offer versatility of installation. Still trying to decide, find out which deck railing system is best for you! Whether you prefer a surface mount or side-mount (often referred to as fascia mount), all three railing systems are perfect for your deck.