How To Tension Cables For A Level Run
Quick Points
Before you begin installing your cable wire, make sure that your posts and handrail are firmly mounted. We provide most of the tools need for this installation, you just need to make sure that you have a:
- Cable Railing Level Tension Kit
- Tape measure
- Plyers
- Sharpie
Step 1 – Tensioning the First End Post
Leaving your cable on the spool, run the loose end through the top hole of all your posts of your run. Crimp a threaded crimp fitting onto the end of the cable, making sure to crimp twice.
Thread your tension receiver onto the threaded crimp fitting, tightening it four turns. Pull the cable back toward the spool, so that the tension receiver is seated flush against the post.
Step 2 – Tensioning the Last End Post
Mark the cable with a sharpie, 3 quarters of an inch from the inside edge of the post. Cut the cable, repeat these steps for each of the other cables on this run.
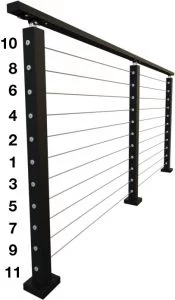
Starting with the middle run, crimp a threaded crimp fitting onto the open end of the cable, making sure to crimp twice. Thread a tension receiver onto the threaded crimp fitting, tightening it four turns. Repeat for the rest of your cable in this run, following this diagram.
Step 3 – Tensioning the Cables
Once all of the cables have been run, and all hardware is mounted, make sure all of the cables are tensioned. Use your plyers to hold the cable in place while you tighten the tension receivers. Make sure, again, to follow the diagram above when tensioning your cables.
.
That’s all you have to do, to run your cables with two level end kits.
Next Step: Cable Tensioning – Corner End Kit to Level KitBack to Cable Railing Installation Hub