Express Buyer's Guide
How to Buy Express Cable Railing
Cable Railing Made Easy
Cable railing can instantly elevate the look and feel of your space, but the buying process can be a bit daunting, especially to a first-timer. With Express cable railing, we’ve simplified the process into four straightforward steps.
Looking for Signature Railing? How to Buy Signature Cable Railing >
Know Your State and Local Code
Knowing your code requirements is a key part of ensuring your railing is safe and secure. In addition to your state’s regulations, you might also have local code requirements to keep track of. One of the best things you can do is check in with your local building department or zoning board. They’ll be able to confirm everything you need to know before you install your railing.
Express cable railing is engineered to exceed code requirements, including the three main railing codes:
- 4-inch and 6-inch sphere rules
- Handrail and guardrail height regulations
- Force and load requirements.
For a detailed explanation: Cable Railing Code & Safety

Size Up Your Space
Accurate measurements are crucial when it comes to properly engineering and manufacturing your cable railing system. Each space is different and should be measured with care in order to collect the most accurate dimensions.
To know what you’ll need for your Express railing, you’ll need to determine three things:
- Level run measurements
The length of each individual side of your deck, balcony, or other fenced-in space - Stair measurements
The total length, number of steps, and rise/run (angle) - Your mounting surface
Wood, concrete, fascia or other material
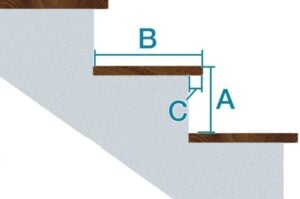
Find the rise and run of your stairs
You’ll need to measure the rise and run of the treads in addition to the linear distance between the top and bottom of the staircase.
- To find the rise (A), measure from the top of one tread to the top of the next tread.
- To find the run, measure from the back of a tread to the front of that tread (B), then subtract any nosing overhang (C).
- Finally, you’ll need to calculate the total number of steps, including the landing area at the top of the staircase.
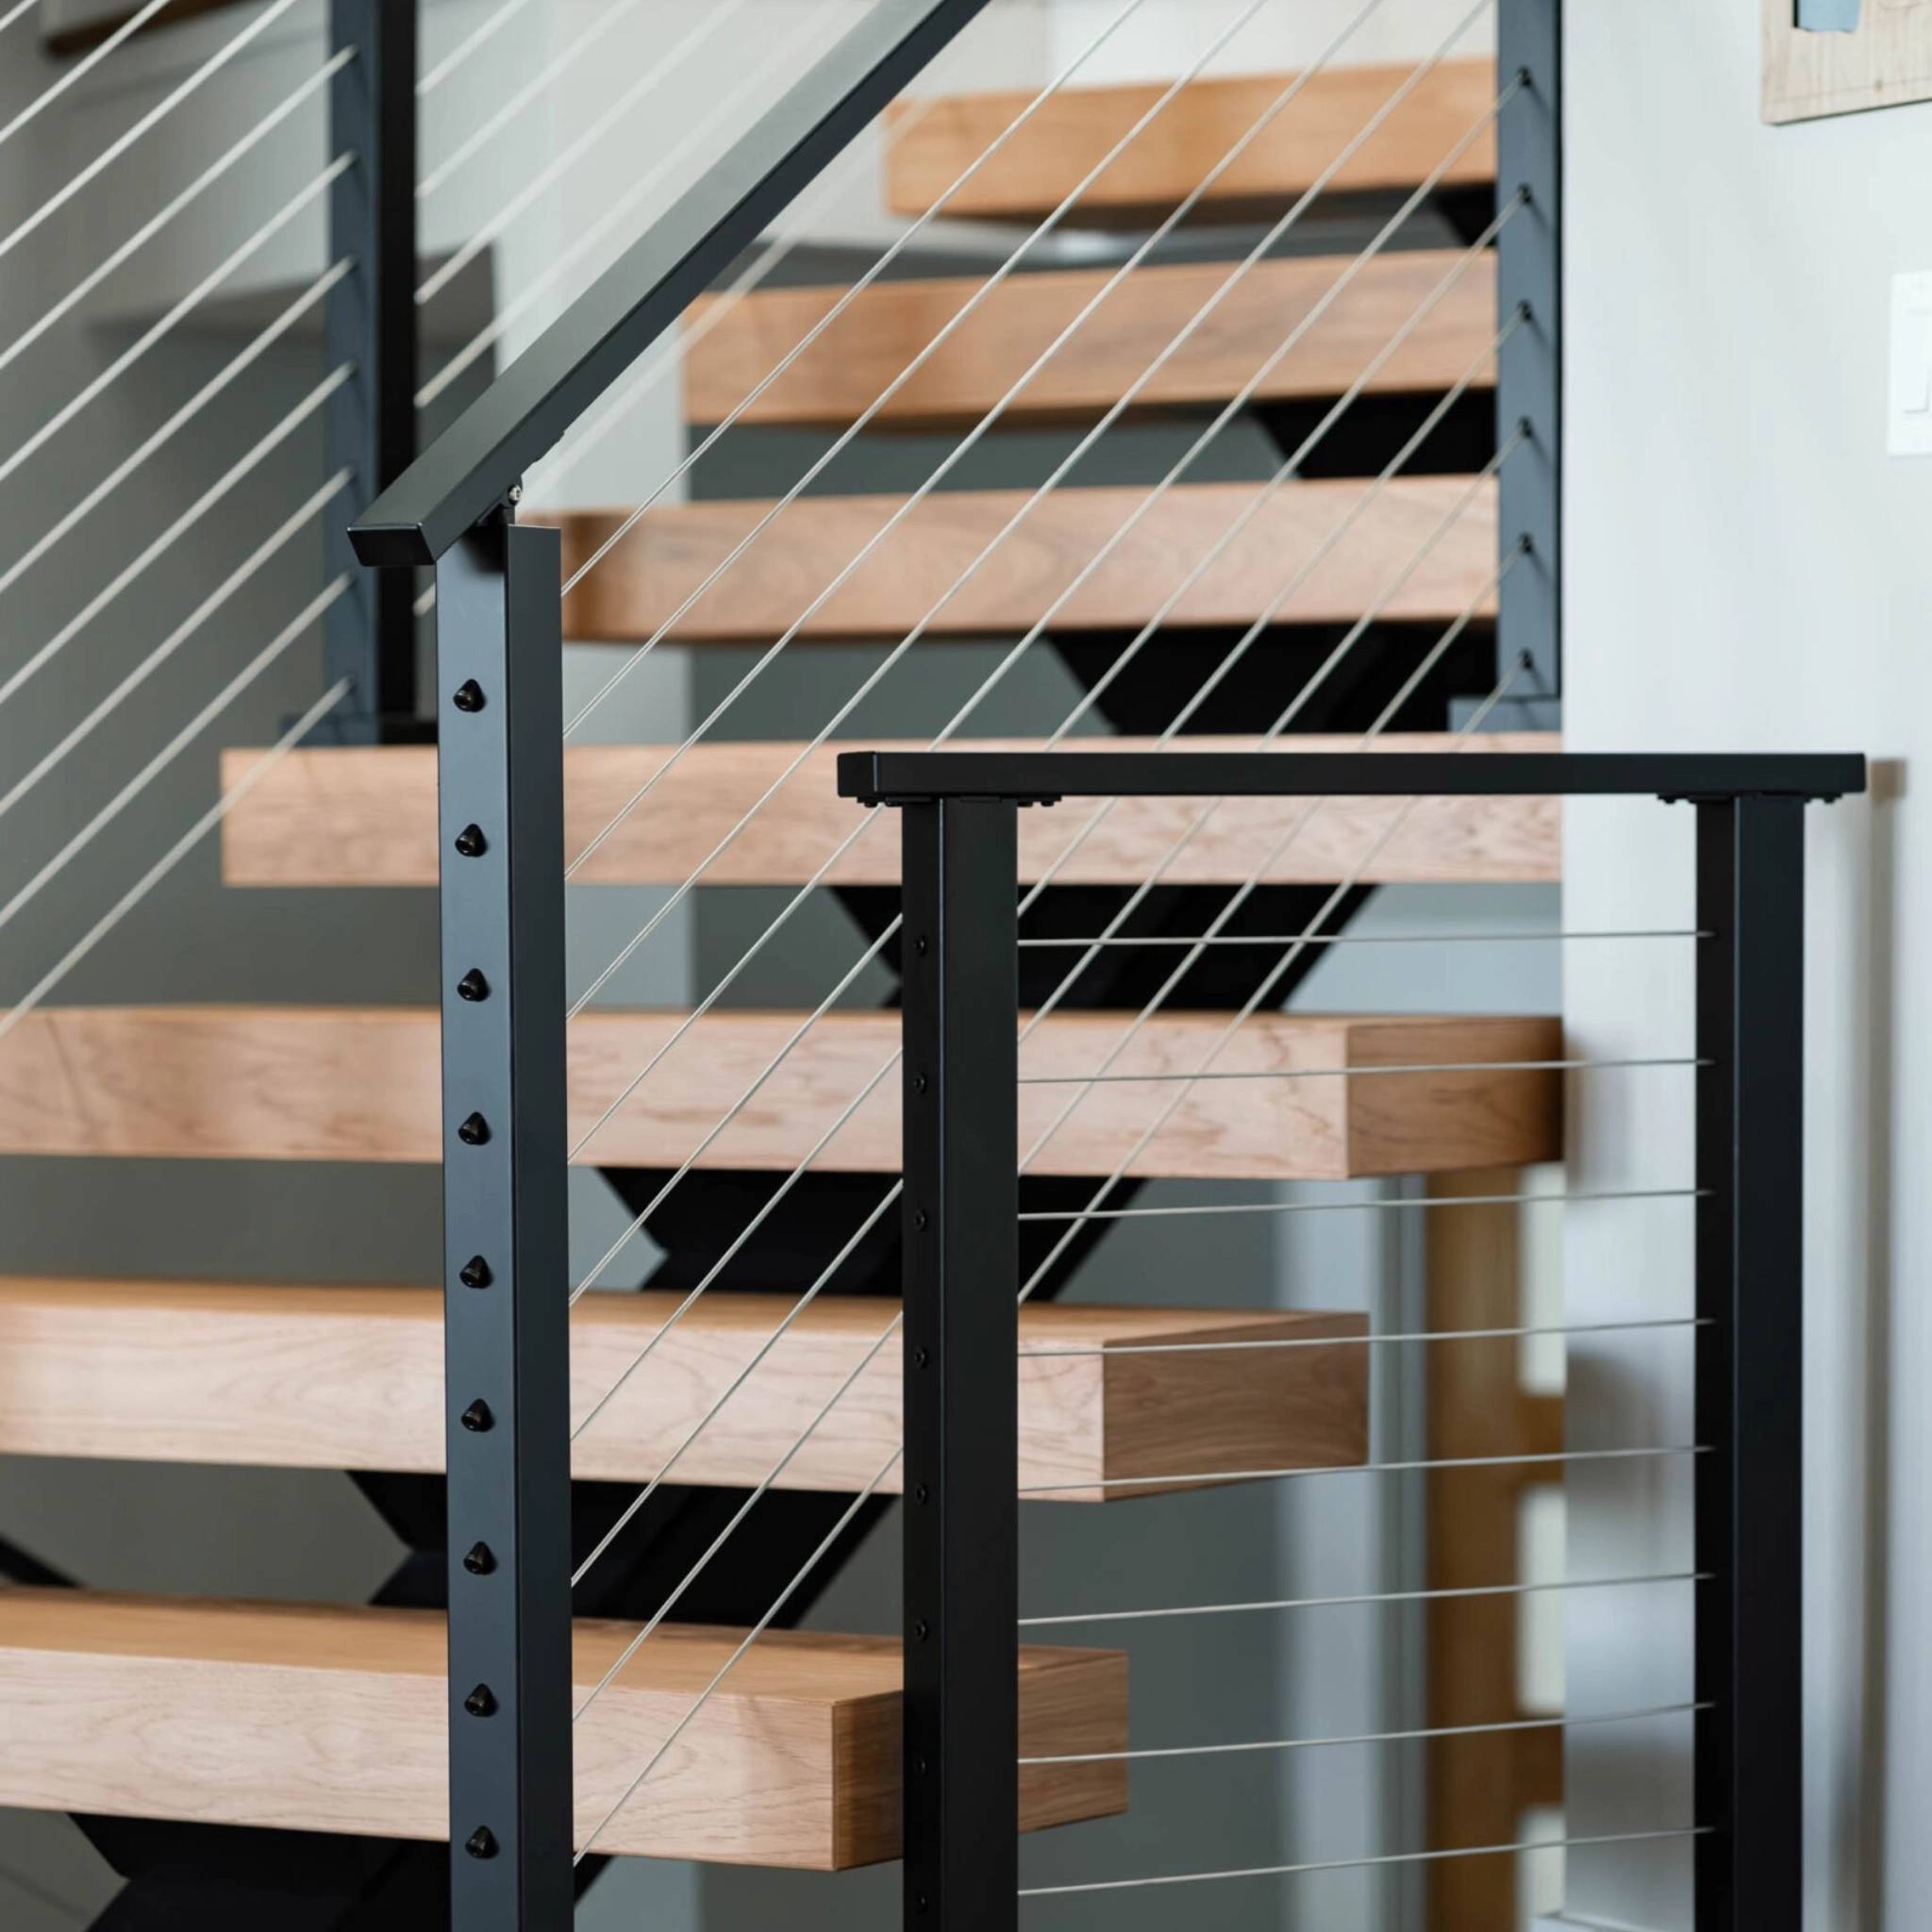
Select Your Style and Color
Surface Mount
In Black, Silver or White


Side Mount
In Black, Silver or White


Choose Your Components
Start With Posts
For level and angled runs.
Available in surface or side mount.
In Black, Silver or White

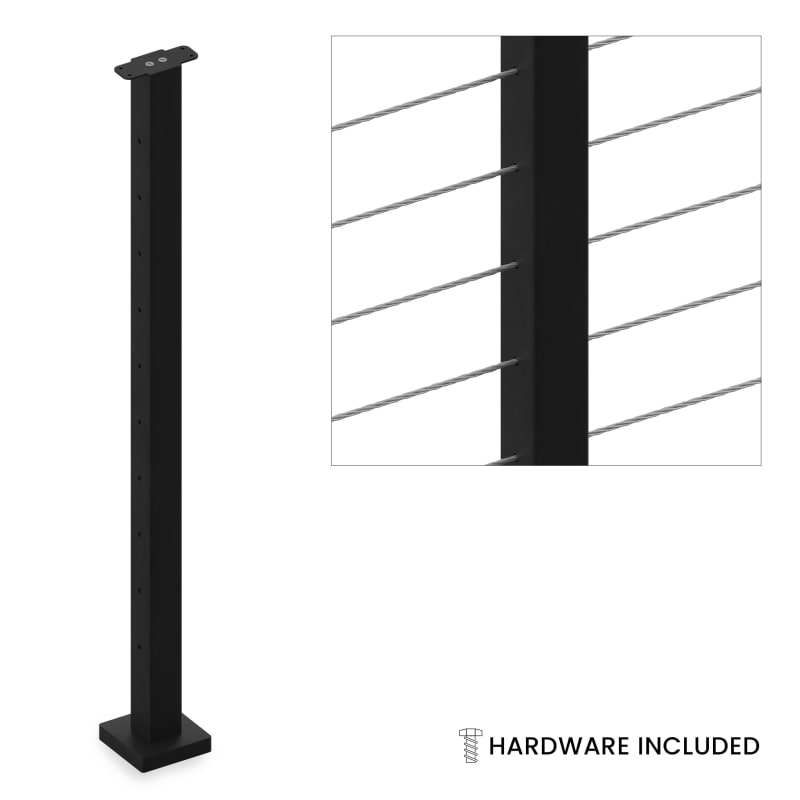
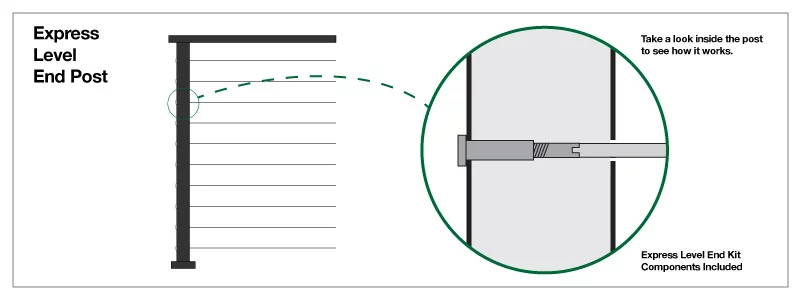
Level End Post
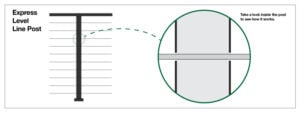
Level Line Post
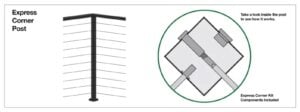
Level Corner Post

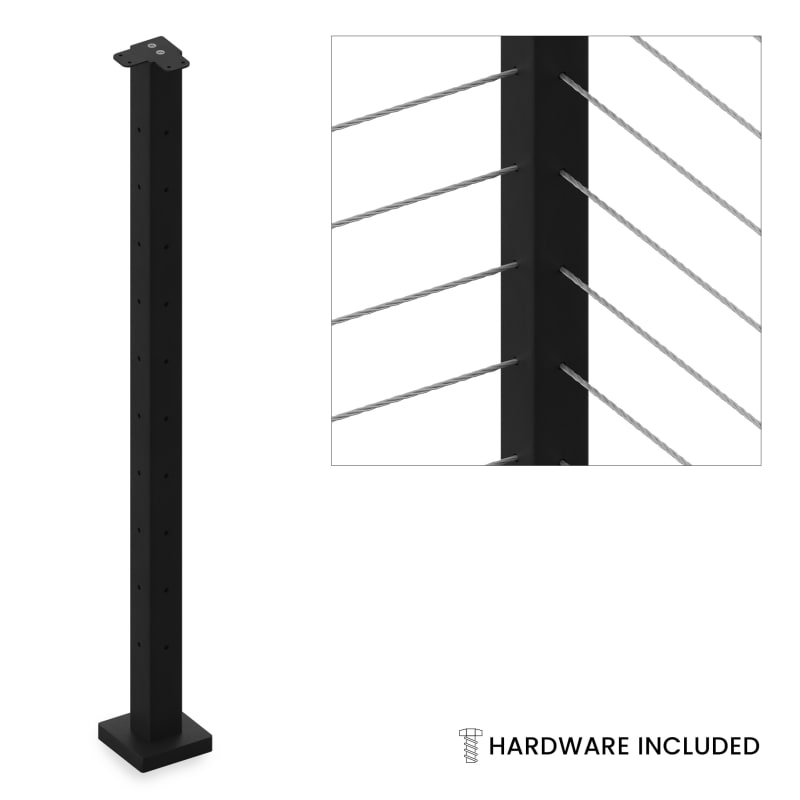
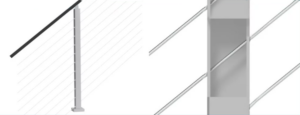
Angle End Post

Angle Line Post
Add the Handrail

Standard Handrail

Beverage Handrail

Wall-Mounted Handrail
Grab Your Cable and Tools
Cable length - (total linear feet x holes per post x 1.1)
Installation Kit - All the tools to install Express


Express Railing Price Calculator
Dev only:
* Price based on linear foot price of Railing plus price of all other Products
* Additional line posts may be required.
Level
Total:
Railing Feet:
Railing Cost:
Products Cost:
| Product | SKU | Price | Quantity | Total |
|---|
Angle (per side)
Total:
Railing Feet:
Railing Cost:
Products Cost:
| Product | SKU | Price | Quantity | Total |
|---|
Complete Your Purchase
Make sure to add an Express Installation Kit to your cart – this has all the tools you need to install your system, including several tools most people don’t typically have in their toolshed.
If you’re still feeling a bit nervous, that’s okay. Feel free to give us a call. One of our sales reps can walk with you through the process to make sure you’ve got all the right measurements and components.
Once you’ve completed your purchase, it will be ready to ship to you in just 1-3 days.
Frequently Asked Questions
There are three types of Express Level Posts and two types of Express Angle Posts. Each type is available in a side mount version.
Express Level End posts are used at the start or end of a run of railing.
Express Level Corner posts are used to turn a level corner with a single post.
Express Level Line posts are used between the ends and corners to keep your railing strong and up to code.
Express Angle End Posts are used at the start or end of a run of railing.

Express Angle Line Posts are used between the end posts to keep your railing strong and up to code.
Express cable comes in 100 or 400-foot spools. To determine how much cable you need, multiply the total linear feet of your level railing by the number of holes in your selected post, or Then, multiply that number by 1.1 to ensure you have enough extra cable in case of any mistakes you might make when cutting.
For example, if you have a 30 foot long run with 36 inch posts, here’s what the math would look like:
30 linear feet of railing x 10 holes on each post = 300 x 1.1 = 330 feet of cable required
In this example, if you purchased a 400 foot spool of cable, you'd have more than enough for your project.
When it comes to handrail, simply purchase enough to cover the linear feet of railing you identified during the measuring process. Express handrail comes in 8 and a half foot lengths, which can be cut down to size on-site if needed. Make sure to identify any place where the handrail ends – you’ll need an end plug for each handrail ending for a clean, safe finish.
No. While other companies force you to figure out what hardware (e.g., fittings and brackets) goes with which posts, Express posts come with all of the hardware you need in one simple bundle.